Now that the Canadian Cannabis Act has come into effect, adult-use recreational cannabis is legal across the country. Along with the commercial retail options which vary by province comes the option to grow your own!
The Cannabis Act explicitly permits the cultivation of up to four cannabis plants per household–offer void in Quebec, Manitoba, and Nunavut, which have banned home cannabis growing at the provincial level.
Just keep in mind that the four-plant rule also includes seedlings. So sprouting four seeds while you have four plants close to maturity amounts to eight plants—double what is allowed.
For Canadians in provinces eligible to home grow, our guide to indoor cannabis growing will help simplify the process for you into clear, easy-to-digest sections designed to help the first-time grower get started.
Get more tips and advice on how to grow marijuana indoors in Leafly’s Guide to Growing.
Step 1: The Set Up
The first step in setting up your personal cannabis grow is creating a suitable space in which to do it. This space doesn’t need to be the typical grow “room; it can be in a closet, tent, cabinet, spare room, or a corner in an unfinished basement. Just keep in mind that you’ll need to tailor your equipment (and plants) to fit the space.
When designing your space, you’ll need to take into account not only the amount of room your plants will need, but also your lights, ducting, fans, and other equipment, as well as leaving enough room for you to work. Cannabis plants can double, even triple in size in the early stage of flowering, so make sure you have adequate head space!
If your grow room is a cabinet, tent, or closet, you can simply open it up and remove the plants to work on them; otherwise, you’ll need to make sure you leave yourself some elbow room.
Cleanliness Is Crucial
Make sure your space is easily sanitized; cleanliness is important when growing indoors, so easy-to-clean surfaces are a must. Carpeting, drapes, and raw wood are all difficult to clean, so avoid these materials if possible.
Keep It Light-Tight
Another crucial criterion for a grow room is that it be light-tight. Light leaks during dark periods will confuse your plants and can cause them to produce male flowers.
Step 2: Choose Your Cannabis Grow Lights
The quality of light in your grow room will be the number one environmental factor in the quality and quantity of your cannabis yields, so it’s a good idea to choose the best lighting setup you can afford. Here’s a brief rundown of the most popular types of cannabis grow lights used for indoor growing.
Shop highly rated dispensaries near you
Showing you dispensaries nearHID Grow Lights

HID (high intensity discharge) lights are the industry standard, widely used for their combination of output, efficiency, and value. They cost a bit more than incandescent or fluorescent fixtures but produce far more light per unit of electricity used. Conversely, they are not as efficient as LED lighting, but they cost as little as one-tenth as much for comparable units.
The two main types of HID lamp used for growing are:
- Metal halide (MH), which produce light that is blue-ish white and are generally used during vegetative growth
- High pressure sodium (HPS), which produce light that is more on the red-orange end of the spectrum and are used during the flowering stage
In addition to bulbs, HID lighting setups require a ballast and hood/reflector for each light. Some ballasts are designed for use with either MH or HPS lamps, while many newer designs will run both.
If you can’t afford both MH and HPS bulbs, start with HPS as they deliver more light per watt. Magnetic ballasts are cheaper than digital ballasts, but run hotter, are less efficient, and harder on your bulbs. Digital ballasts are generally a better option, but are more expensive. Beware of cheap digital ballasts, as they are often not well shielded and can create electromagnetic interference that will affect radio and WiFi signals.
Unless you’re growing in a large, open space with a lot of ventilation, you’ll need air-cooled reflector hoods to mount your lamps in, as HID bulbs produce a lot of heat. This requires ducting and exhaust fans, which will increase your initial cost but make controlling the temperature in your grow room much easier.
Fluorescent Grow Lights
Fluorescent light fixtures, particularly those using high-output (HO) T5 bulbs, are quite popular with small scale hobby growers for the following reasons:
- They tend to be cheaper to set up, as reflector, ballast, and bulbs are included in a single package
- They don’t require a cooling system since they don’t generate near the amount of heat that HID setups do
The main drawback is that fluorescent lights are less efficient, generating about 20-30% less light per watt of electricity used. Space is another concern, as it would require approximately 19 four-foot long T5 HO bulbs to equal the output of a single 600 watt HPS bulb.
LED Grow Lights
Light emitting diode (LED) technology has been around for a while, but only recently has it been adapted to create super efficient light fixtures for indoor growing. The main drawback to LED grow lights is their cost: well designed fixtures can cost 10 times what a comparable HID setup would. The benefits are that LEDs last much longer, use far less electricity, create less heat, and the best designs generate a fuller spectrum of light, which can lead to bigger yields and better quality.
Unfortunately, there are many shoddy LED lights being produced and marketed towards growers, so do some research and read product reviews before laying down your hard-earned cash.
Induction Grow Lights
Induction lamps, otherwise known as electrodeless fluorescent lamps, are another old technology that has been recently adapted to suit the needs of indoor growers. Invented by Nikola Tesla in the late 1800s, the induction lamp is essentially a more efficient, longer-lasting version of the fluorescent bulb. The main drawback of these fixtures is their price and availability.
Step 3: Give Your Cannabis Plants Air

Plants need fresh air to thrive, and carbon dioxide (CO2) is essential to the process of photosynthesis. This means you will need a steady stream of air flowing through your grow room, easily achieved by means of an exhaust fan placed near the top of the room to remove the warmer air, and a filtered air inlet on the opposite side near the floor.
You’ll need to ensure that temperatures remain within a comfortable range for your plants, between 21.1 degrees C and 29.5 degrees C when lights are on and between 14.4 degrees C and 21.1 degrees C when they are off. Some varieties of cannabis (generally indica strains) prefer the lower side of the range, while others are more tolerant of higher temperatures.
The size of your exhaust fan will depend on the size of your grow space and amount of heat generated by your lighting system. HID systems put out a ton of heat, especially if they aren’t mounted in air-cooled hoods. People who live in warmer regions will often run their lights at night in an effort to keep temperatures in their grow down.
It’s advisable to set up your lights, turn them on for a while, and then determine how much airflow you’ll need to maintain a comfortable temperature for your plants. This will allow you to choose an exhaust fan suitable for your needs. If the odor of cannabis plants in bloom will cause you problems, add a charcoal filter to your exhaust fan.
Alternately, you can create a sealed, artificial environment by using an air conditioner, dehumidifier, and supplemental CO2 system, but this is quite expensive and not recommended for the first-time grower.
Finally, it’s a good idea to have a constant light breeze in your grow room as this strengthens your plants’ stems and creates a less hospitable environment for mold and flying pests. A wall-mounted circulating fan works well for this purpose — just don’t point it directly at your plants, because that can cause windburn.
Step 4: Pick Your Controls and Monitoring
Once you have selected your lights and climate control equipment, you’ll want to automate their functions. While there are sophisticated (and expensive) units available that control lights, temperature, humidity, and CO2 levels, the beginner will generally need a simple 24hour timer for the light and an adjustable thermostat switch for the exhaust fan.
The timing of the light/dark cycle is very important when growing cannabis; generally, you will have your lights on for 16-20 hours per 24 hour period while the plants are in vegetative growth, then switch to 12 hours of light per 24 when you want them to bloom. You need your lights to turn on and off at the same times every day or you risk stressing your plants, so a timer is essential. You can use a timer for your exhaust fan as well, but spending a few extra dollars on a thermostat switch is a much better option.
With the most basic models, you simply set the thermostat on the device to the maximum desired temperature for your space and plug your exhaust fan into it. Once the temperature rises to the level you set, it will turn the fan on until temperatures fall a few degrees below the set threshold. This saves energy and maintains a steady temperature.
Since you’re probably not spending most of your time in your grow space, a combination hygrometer/thermostat with high/low memory feature can be very handy in keeping tabs on conditions in your room. These small, inexpensive devices not only show you the current temperature and humidity level, but the highest and lowest readings for the period of time since you last checked.
It’s also a good idea to keep a pH meter or test kit on hand so you can check the pH level of your water, nutrient solution, or soil. Cannabis prefers a pH between 6 and 7 in soil, and between 5.5 and 6.5 in hydroponic media. Letting the pH get out of this range can lead to nutrient lockout, meaning your plants are unable to absorb the nutrients they need, so be sure to test your water and soil regularly and make sure the nutrient mix you are feeding your plants falls within the desired range.
Step 5: Decide on a Cannabis Grow Medium

Growing indoors means you have many different methods to choose from, and whether it’s good old fashioned pots full of soil or a rockwool slab in a hydroponic tray, every medium has its benefits and drawbacks. Here we’ll examine the two most popular methods and the media they employ.
Soil
Soil is the most traditional medium for growing cannabis indoors, as well as the most forgiving, making it a good choice for first-time growers. Any high quality potting soil will work, as long as it doesn’t contain artificial extended release fertilizer (like Miracle Gro), which is unsuitable for growing good cannabis.
A very good choice for beginners is organic pre-fertilized soil (often referred to as “super-soil”) that can grow cannabis plants from start to finish without any added nutrients, if used correctly. This can be made yourself by combining worm castings, bat guano, and other components with a good soil and letting it sit for a few weeks, or it can be purchased pre-made from a few different suppliers.
As with all organic growing, this method relies on a healthy population of mycorrhizae and soil bacteria to facilitate the conversion of organic matter into nutrients that are useable to the plant. Alternately, you can use a regular soil mix and then supplement your plants with liquid nutrients as the soil is depleted.
Soilless (aka Hydroponics)
Indoor growers are increasingly turning to soilless, hydroponic media for cultivating cannabis plants. This method requires feeding with concentrated solutions of mineral salt nutrients that are absorbed directly by the roots through the process of osmosis. The technique for quicker nutrient uptake leading to faster growth and bigger yields, but it also requires a higher order of precision as plants are quicker to react to over or underfeeding and are more susceptible to nutrient burn and lockout.

Different materials used include rockwool, vermiculite, expanded clay pebbles, perlite, and coco coir, just to name a few. Commercial soilless mixes are widely available that combine two or more of these media to create an optimized growing mix. Soilless media can be used in automated hydroponic setups or in hand-watered individual containers.
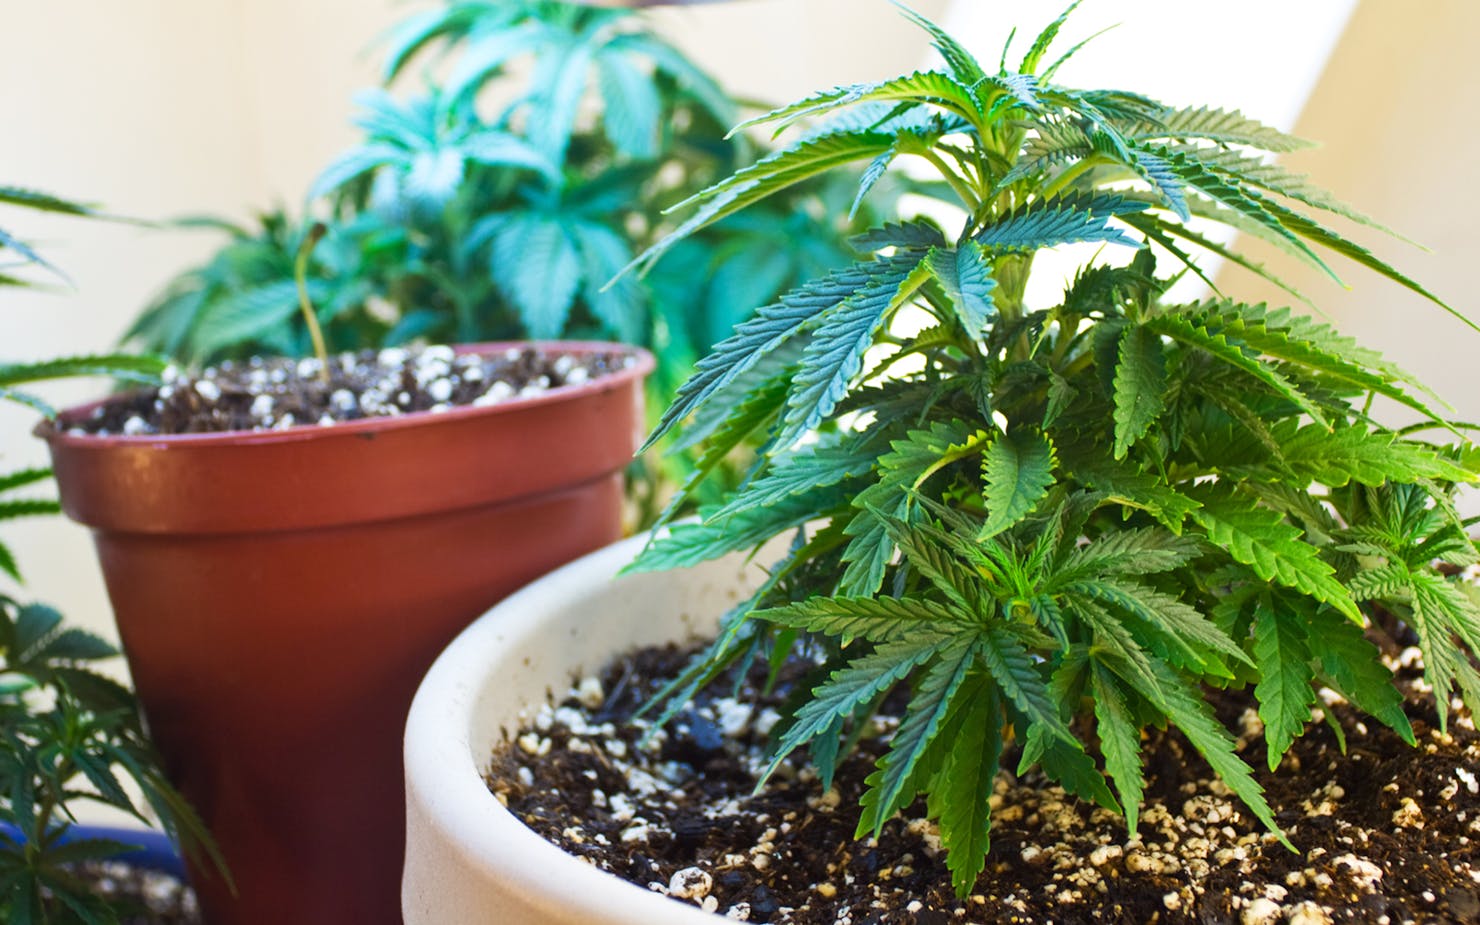
Step 6: Determine What to Grow Your Cannabis In
What type of container you use will depend on the medium, the system, and the size of your plants. A flood-and-drain, tray-style hydroponic system may use small net pots filled with clay pebbles or just a big slab of rockwool to grow many little plants, while a “super-soil” grow may use 10 gallon nursery pots to grow a few large plants.
Inexpensive options include disposable perforated plastic bags or cloth bags, while some choose to spend more on “smart pots,” containers that are designed to enhance airflow to the plant’s root zone. Many people grow their first cannabis plants in five gallon buckets. Drainage is key, though, as cannabis plants are very sensitive to water-logged conditions, so if you repurpose other containers, be sure to drill holes in the bottoms and set them in trays.
Step 7: Feed Your Cannabis Plants Nutrients
Growing high-quality cannabis flowers requires more fertilizer, or nutrients, than most common crops. Your plant needs the following primary nutrients (collectively known as macronutrients):
- Nitrogen (N)
- Phosphorus (P)
- Potassium (K)
These micronutrients are needed as well, albeit in much smaller quantities:
- Calcium
- Magnesium
- Iron
- Copper
If you aren’t using a pre-fertilized organic soil mix, you will need to feed your plants at least once a week using an appropriate nutrient solution. These nutrients are sold in concentrated liquid or powder form meant to be mixed with water, and generally formulated for either vegetative or flower (“bloom”) growth. This is because cannabis has changing macronutrient requirements during its lifecycle, needing more nitrogen during vegetative growth, and more phosphorus and potassium during bud production.
Most macronutrients are sold in a two-part liquid to prevent certain elements from precipitating (combining into an inert solid that is unusable by the plant), meaning you’ll need to purchase two bottles (part A and part B) for veg, and two bottles for grow, as well as a bottle of micronutrients. Other than these basics, the only other nutrient product you may need to purchase is a Cal/Mag supplement, as some strains require more calcium and magnesium than others.
Once you’ve purchased the necessary nutrient products, simply mix them with water as directed by the label and water your plants with this solution. You should always start at half-strength because cannabis plants are easily burned. It’s almost always worse to overfeed your plants than to underfeed them, and over time you will learn to “read” your plants for signs of deficiencies or excesses.
Step 8: Water Your Cannabis Plants

Most people won’t think twice about the water they use on their plants; if you can drink it, it must be fine, right? Well, it may not be an issue, depending on your location, but some water contains a high amount of dissolved minerals that can build up in the root zone and affect nutrient uptake, or it may contain fungus or other pathogens that aren’t harmful to people but can lead to root disease.
Additionally, some places may have high levels of chlorine in the water supply, which can be harmful to beneficial soil microbes. For these reasons, many people choose to filter the water they use in their gardens.
The most important thing to remember during this phase is to not overwater. Cannabis plants are very susceptible to fungal root diseases when conditions are too wet, and overwatering is one of the most common mistakes made by the beginning grower. How often you water your plants will depend on the medium used, size of the plants, and ambient temperature. Some people will wait until the lower leaves of the plant start to droop slightly before watering.
As you gain experience and knowledge, you will alter your grow room and equipment to better fit your particular environment, growing techniques, and for the specific strains you choose, but hopefully this article will provide you with a solid foundation of knowledge to get started on the right foot. And remember, growing cannabis is a labour of love, so spend a lot of time with your plants and have fun!
With files from Thomas Valentine.


